Primer is cured and time to dimple all the rib and spar flanges. I used the pneumatic squeezer for this task. Just be careful not to punch an extra hole in the parts!
Used the DRDT-2 on the skins. Easy as pie! Again, careful not to punch an extra hole. The rudder skins are extremely thin so be careful as anything will bend or dent them! Even bending over a cleco slightly will make a dent!
Riveting the smaller flange to the bottom rib.
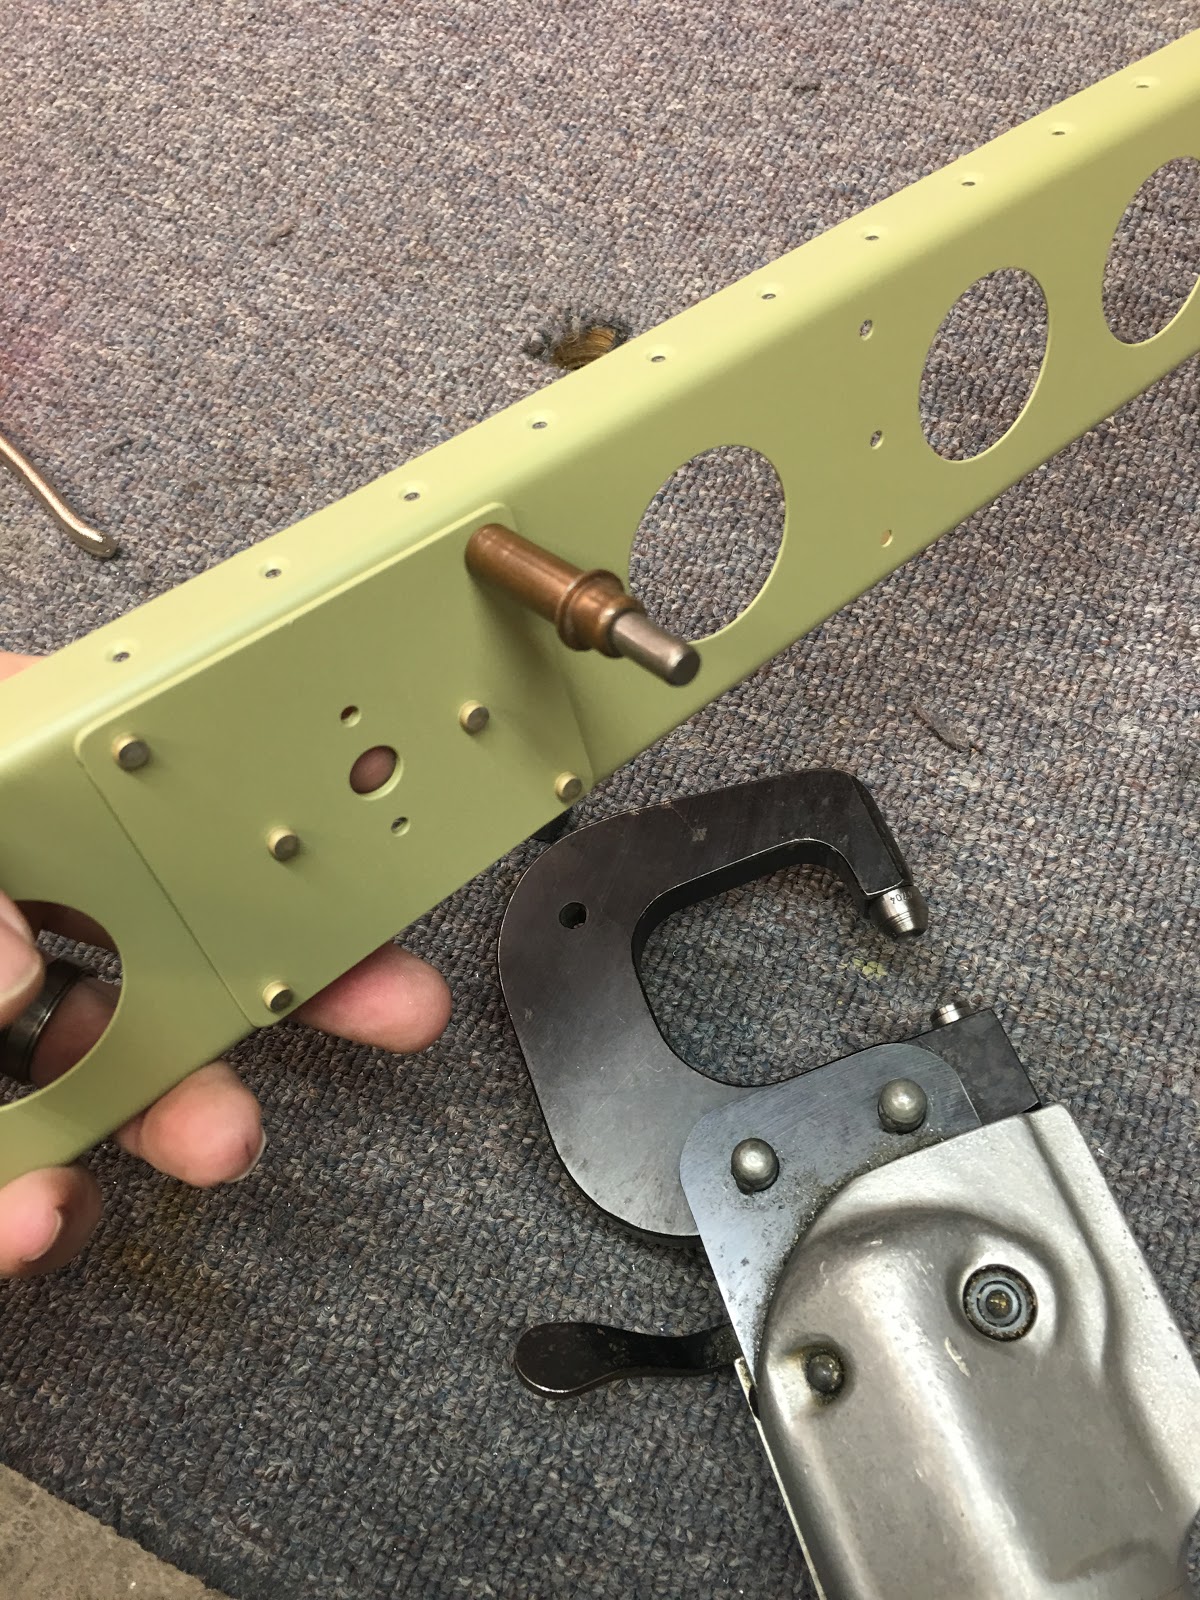
Riveting the hinge bearing nutplate onto the rudder horn.
Riveting the rudder horn to the bottom rib.
Riveting the top hinge bearing doubler plate.
Riveting the bottom hinge bearing doubler plate.
Riveting the bottom hinge bearing nutplate.
Riveting the top hinge bearing nutplate.
I have always used this "magic" "removable" by Scotch to hold my rivets that I am going to back-rivet. This stuff works really well for the purpose and comes off clean and easy.
Using the back-rivet set to back-rivet the stiffeners to the skins. My back-rivet plate is kinda small so I have to be careful that I am on top of it with the rivets. I almost messed one up as I was slightly off the edge. It made a little mark in the skin but I am the only one that will notice it. After paint it will be gone.
Right side skin done! Pay careful attention to the orientation of the stiffeners and make sure you have the correct handed part.
Left side done!
Riveting the top rib half to the left skin. Have to leave the last three holes open for future work.
Riveting the top rib half to the right skin. Have to leave the last three holes open for future work.
Riveting the bottom rib/rudder horn to the right side skin. The last hole is virtually impossible to rivet with a solid rivet. I tried using a large flat blade screwdriver, tried a prybar, etc. as a bucking bar and hitting it with the rivet gun but never could get it and had to drill it out twice. I gave up and just put a flush pop rivet in there like the directions instruct you to do on the left side skin.
Next you blind rivet all of the shear clips to the right hand skin. Not sure why these are pop rivets since they are accessible but I just follow directions.
Shear clips all installed. Pay attention to correct location and orientation!
Next I decided to use the 3M VHB tape method to secure the trailing edge for riveting. This is the newest method recommended by Van's instead of the pro-seal method.
I cleaned the parts with alcohol per the directions and applied 2 layers per side to the AEX trailing edge strip. I used 2 layers per side because a couple people claim it works better. I applied the wedge to the right skin per the directions. I left the cover strip in the tape for the exposed side for now.
Next you have to pop rivet the tail of the stiffeners together. There are two holes on each but you only pull a rivet in the fwd most hole and the aft hole remains empty. It is a tight area to work in there but doable. Have no idea how anyone with a weak grip could do this but I had no problems. You have to make sure the left stiffener overlaps the right side one. You also have to make sure that the shear clip is sitting on top of the stiffener. If you rivet the back and the shear clip is on the wrong side, it would be hard to move it to the top without bending something.
Next the pop rivets go into the shear clip to the right side stiffener. I did these as I went along riveting the rear hole.
With the stiffeners and shear clips all riveted, I followed the directions by putting a very straight heavy board on the rudder to hold it down flat and pulled the cover strip off of the trailing edge tape, sticking the skin to the AEX trailing edge wedge. I randomly put cleco's in until the entire trailing edge was full.
I am hoping this new method works out as it is much cleaner, easier, and faster than pro-seal! The edge is super straight at this point. I have a heavy stainless straight edge and it appears to be super flat and straight. Hopefully I can keep it that way. I have ordered some new flat dies for the squeezer and plan to grind them at an angle and use them to squeeze the trailing edge instead of back-riveting. Many people say this works much better.


No comments:
Post a Comment