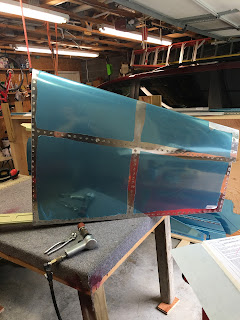
Saturday, September 15, 2018

Started working on rudder!

First you have to mark and then cut apart some rib pieces.

Then you have to mark and cut apart some rib shear clips.

Then you have to mark and cut some stiffeners.  They get progressively shorter and you end up with a left and a right part.

I used the band saw to cut apart the ribs.

Cutting the shear clips.

Cutting the stiffeners.

Lots of parts all ready for match reaming!

I reamed the rib flanges to the rib.

Next you have to do some cleanup of the rudder horn.

Lots of work on this puppy.  Lots of edges, angles, radius’s, and notches to be cleaned up and deburered.
I bought some of this abrasive cord and tape to see if it helps with these kinds of jobs.  It does work better than strips of Emory cloth.

The tape....for flat edges.

They have you countersink a couple nutplate mounting holes.

Then a couple more holes on the other side.

Then you cleco it to the bottom rib and drill the horn to the rib and flange.

All drilled.

Next you cleco this assembly to the spar and match team it it all.

Countersinking the rudder stop reinforcement plates.

Next they have you cleco together the stiffener parts and shear clips to form the rudder ribs.

Here they are all clecoed and match reamed.

Then they have you cleco them to the spar.

Then you cleco the hinge doubler plates to the spar.  One on the middle.

And one toward the top. 

Then everything is match reamed together.

That is all for me today!


Finished VS!

Riveted the front spar to skin rivets on one side.  This is done by lifting up the skin on the aft side and sticking your arm and bar in there.  The lower part can be done by sticking arm up the bottom between the spars.

A few bucking bar scratches but overall it looks good.

The other end.

The action is riveting.....bahahaha!

Both sides done!

Next I worked on the inter spar rib by sticking my arm up the bottom in between the spars.


My youngest daughter helped me hold the VS.

She had fun for about  2minutes.

Front spar on one side done.

Middle rib done!

Finished the tip rib with the squeezer.


All done!

Decided to go ahead and squeeze the rear spar rivets since the top half of the front spar is all riveted.

Getting there!

One side done!

Other side done!

Working on the other side of the rivets below the middle rib.

Middle rib rivets all done.  Front spar rivets all done!

The inside!

Riveting on the bottom tip and middle ribs.

Lower rib to front spar rivets.  I hate thes kind of rivet jobs because of the weird angles involved and the thin rib flanges.  Let my set slip in the right one.  Had to replace it.

Bottom rib to rear spar rivets.  These were easy with the squeezer!

Finishing up the bottom rib to skin rivets with the squeezer.  Making sure to leave the holes empty that will get nutplates for the emp fairing attachment later.

The obligatory picture of me with my finished VS.  The first major sub part done!

Thursday, September 13, 2018

VS Skin Rivet Time!

Started riveting the VS skin tonight.  Nothing like re-honing your riveting skills by starting out with blind bucking, long reach riveting!  NOT!  So the directions have you pull out the bottom tip rib so you can buck the middle tip rib rivets.  Not hard, just awkward!  I found the called out -3.5 rivets too long for these as they were too easy to tip, club or cleat over (whatever you call it).  The -3 rivets worked fine.

If you do this alone, you have to stick your arm and bucking bar all the way up to the middle rib and feel your way through the process.  Using the other hand to run the gun and keep it under control.  It is easy to scar up everything in there so be careful.  It is also easy to dent the skin with a wild bucking bar so be careful with that as well.

You kind of have to figure out the right way to hold the bucking bar to keep it in check and minimize any damage.

I use a tungsten bar whenever possible.  This was another one of my favorite luxury tool purchases when building the RV-7.  I wrap it in tape where I can to prevent scratches and dents.

 Side one done!

 From the outside...

 Side 2 done!  Love the durability of the AKZO.  It will scratch but nowhere near as easy as any of the other primers I have used in the past!

Now the directions have you rivet the top tip rib only to the skin fwd of the spar.  Easy peasy with the squeezer!  Back to -3.5 rivets here due to the extra control gained by using the squeezer instead of the gun and bucking bar.

 Other side!

 All done!

Next they have you rivet the bottom tip rib to the skin only....skipping the holes that are used later for the emp. fairing attachment screws.

 Side one....easy with the squeezer!

 Skip those holes!

 Done!

Next will be the blind bucking of the skin to front spar and middle rib.  The upper side has to be done by lifting the skin so you can get your arm and bucking bar in there.  That is where I stopped for tonight.  Had to attend a seminar at our kids school tonight so this work session is short!