I am trying out my new single flute countersink cutter. These things cut amazingly fast and you need to be careful with them or you can break the pilot off.

Edited 09/12/2018...found a mistake I made!
(upon further review, I screwed up more than I thought. I actually countersunk the rear spar flanges below where the VS skin ends and this is a no no....This area should not be countersunk because it gets AN470AD3 rivets instead. They call for small universal head rivets in this area because the spar fits inside the finished fuse and there is little clearance. I will just put flush AN426 rivets in this area instead)
One side all done!
The countersink needs to be deep enough to accept the dimple in the VS skin. The cutter ends up countersinking the spar cap a little bit by the time it is deep enough.
(NOTE: It appears that my techniques for determining countersink depth when the hole is to receive a dimpled skin is dated. The factory has different guidance from what I was always taught and I want to ensure that the most current methods are made known. Please see the details below)
I made a new test coupon for #40 and #30 dimples.
(NOTE: It appears that my techniques for determining countersink depth when the hole is to receive a dimpled skin is dated. The factory has different guidance from what I was always taught and I want to ensure that the most current methods are made known. Please see the details below)
I kept sneaking up on the depth until the dimple fit the countersink nicely. (Don't do this, see below) Must be careful not to go too deep. Van's says 0.007" deeper than flush for a rivet. This leaves a tiny bit of a gap between the skin and the flange. Back in my RV-7 build days they never said anything about 0.007" they just said countersink deep enough to allow the dimple to sit inside and allow the skin to sit flush on the flange. If you countersink deep enough for flush, the depth is about 0.012-0.015" deeper than flush.(Don't do this, see below)
(NOTE: It appears that my techniques for determining countersink depth when the hole is to receive a dimpled skin is dated. The factory has different guidance from what I was always taught and I want to ensure that the most current methods are made known. Please see the details below)
Please see the following note from Scott McDaniels who is a long term Van's employee that was nice enough to offer details behind why the guidance was improved on countersink depth when the hole is to receive a dimpled skin.
"Hi Brian,
I noticed on your blog you mentioning your countersink depth of .012-.015" deeper than flush compared to Van's recommended of .007 deeper.
The .007 deeper is based on detailed analysis of riveted joints after sectioning them, polishing them, and inspecting under magnification.
The error that people make by working to a depth that allows the skin to lay 100% flush is that they forget that on the the cross section shape of the dimple has a small radius where the skin is reformed to make the dimple, but the machine counter sink has a sharp corner. It is the interference of this radius on the sharp corner that you are compensating for in order to get the skin to lay 100 % flush. Doing so results in a gap between the sides of the dimple and the countersink that is clearly visible in the sectioning tests I mentioned.
The finished appearance as far as how it looks on the exterior between the two countersink depths is indistinguishable, but the long term integrity could be compromised which is why Van's recommends no more than .007 deeper for dimples into countersinks.
Scott McDaniels"
Used the new single flut debur bit in the screwdriver to deburr all the rib flange holes.
I have several small files that I use to deburr all the ribs in the corners and these little notches.
I use these 3M wheels where I can to smooth the edges.
Medium grit strips of emory cloth as well. Does not last but a few strokes per strip but it gets it done.
Front spar getting deburred.
Front spar doubler gets the bottom 4 holes countersunk to receive dimples on the front spar. Flush rivets will go here.
Cut the rudder stops out per the directions.
The parts get hot fast! Need gloves!
Next the rudder stops get drilled to the upper half of the lower rudder hinge bracket.
Drill a hole, move the cleco, drill another rinse and repeat.
I plan to paint everything so I went ahead and scuffed up the powder coat on these hinge brackets to help the paint stick sometime in the future.
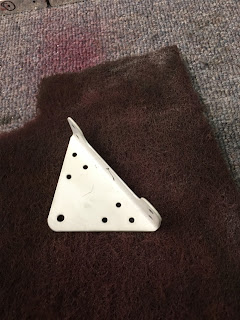
All the parts of the VS deburred and ready to prep for priming. They will all get scrubbed with maroon scotchbrite, cleaned with solvent and then sprayed.
I am going to wait till after priming to dimple the parts needing dimpled. I am not sure I will like doing that or not. I always dimpled first with the RV-7 but I did not use AKZO on that one. The word on the street is that AKZO is so tough that dimpling it does not damage it at all. Having the parts non dimpled should help me do a better job scuffing up the parts with the scotchbrite. The dimples make that more difficult and tear up the pads prematurely. I will see how this VS goes and may continue doing it that way if I like it.


No comments:
Post a Comment