Short assembly time today since I had to help my uncle (neighbor) to switch and old sliding glass door out to a fake french patio door. This was a real chore since the brick in his house was laid up to the old door without any sort of brick molding. Also after 40 years, there was some rot on his flooring under the original door and just inside that had to be cut out and replaced. We got er done and then I had a few minutes to work on the plane parts.
Used the squeezer on all of these rivets. Had to be careful with alignment since the flanges are so wide with the spar caps hanging out a bit that the edge of the yoke would hit the spar cap and scratch it and or cause the set to slightly touch the spar doubler around the edge of the manufactured head of the rivet. This leaves a little concentric smile mark just to the rivet on the base material. I don't like that!
Next I riveted on the powder coated steel hinge brackets. Van's wants the manufactured heads on the brackets for some reason. This goes against the normal advice to put them on the thinnest/weaker material. Oh well....I just follow directions.
Riveted the center hinge bearing block together. This was the first part riveted on my original RV-7. Since it is a sealed bearing, I went ahead and primed it as well since the bearing is mounted in some raw aluminum.
Torqued the bearing block mount bolts. Even with a small 1/4" drive torque wrench, the torque required for the AN3 bolts is very low. It is at the bottom of this wrench's scale. Very little "clicking" can be felt at the proper torque. Be careful not to over torque!
Rear spar ready for the next steps!
Front spare all assembled with cleco's. Similar process to the rear except there are a ton more different size rivets required. Pay attention to the drawings!
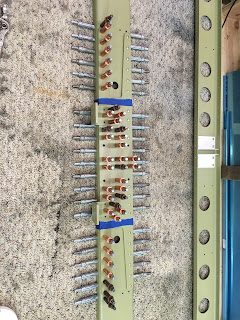
Top row of spar, doubler, and spar cap rivets done.
Front spar all finished and ready for the next steps! The missing rivets are intentional.
Wow this sure was a ton of work to get to the point of being ready to use these spars in the actual HS prep process. Building a HS for a -10 is almost like building a wing for the RV-7 as far as work required.


No comments:
Post a Comment